
Fluid Checks Every Driver Should Know How to Do
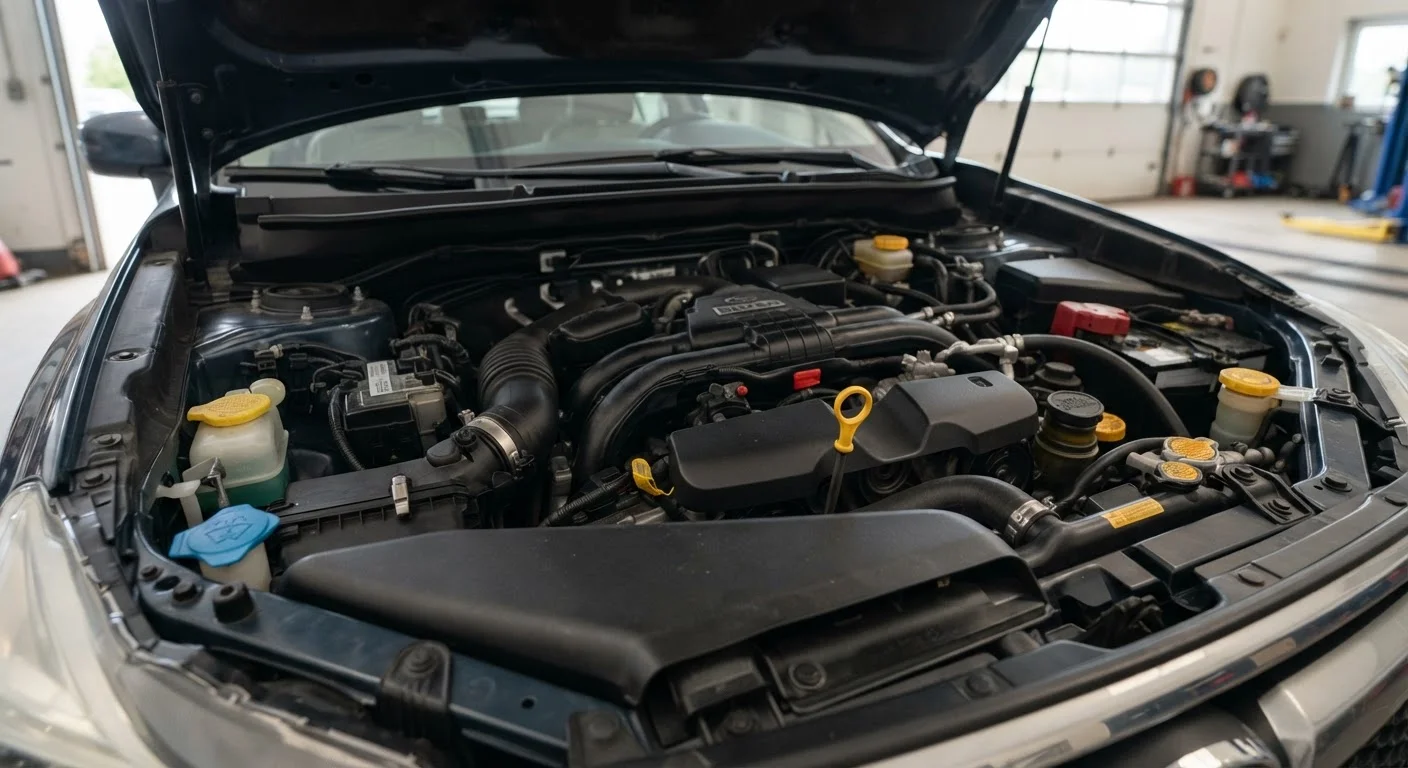
Photo credit: TrendingExperts.net
In this article
Engine oil, coolant, brake fluid, power steering — here's a practical walkthrough of the under-hood fluids you can monitor yourself between service visits.
Key Takeaways
- Most under-hood fluid checks require no tools and take only a few minutes.
- Engine oil, coolant, brake fluid, and power steering fluid each have distinct check points.
- Color and consistency often reveal as much as fluid level does.
- Consistently low fluid levels may signal a leak that warrants a mechanic's inspection.
- Always check fluids when the engine is cold or has had time to cool for accurate readings.
Why Fluid Checks Matter Between Service Visits
Vehicle fluids don't just provide lubrication - they regulate temperature, transmit force, and protect components that would otherwise wear out quickly. Unlike a warning light, a gradual fluid leak or degraded fluid condition can develop silently over weeks. By the time a dashboard alert appears, some damage may already have occurred.
Routine fluid monitoring is one of the simplest, lowest-cost habits a driver can build. It requires no mechanical skill, no tools beyond a rag, and roughly 10-20 minutes. Done consistently - monthly or before long trips - it gives you an early window into your vehicle's health. Pair these checks with the guidance in our routine maintenance schedule overview to keep the bigger picture in view.
What you will need
Before you start, gather what you need and review the tool suggestions below.
Clean lint-free rag or paper towels
Used to wipe the oil dipstick clean before taking a reading and to check fluid color.
Flashlight or phone torch
Illuminates the engine bay for easier identification of reservoirs and fluid markings.
Owner's manual
Identifies the correct fluid type, reservoir locations, and manufacturer fill specifications for your vehicle.
Step-by-Step: Checking Your Vehicle's Key Fluids
The following steps walk through the four fluids most drivers can monitor themselves: engine oil, coolant, brake fluid, and power steering fluid. Work through them in order for the most efficient under-hood visit.
Park on level ground and let the engine cool
Pull onto a flat, stable surface and turn off the engine. For oil and coolant checks, wait at least 10-15 minutes after driving - hot fluids give inaccurate level readings and pose a burn risk. Brake fluid and power steering reservoirs can typically be checked sooner since they are less heat-sensitive, but cooling first is always the safer habit.
Check engine oil level and condition
Locate the oil dipstick - it typically has a brightly colored handle (yellow or orange) and is labeled. Pull it out fully, wipe it clean with your rag, reinsert it all the way, then pull it out again for a true reading. The oil film should fall between the two marks at the bottom of the dipstick. Also examine the oil on the rag: healthy oil ranges from amber to dark brown. Black, gritty, or milky oil warrants a prompt visit to a mechanic.
Inspect the coolant (antifreeze) reservoir
The coolant reservoir is a translucent plastic tank near the radiator, marked with MIN and MAX lines. Check the level visually through the tank wall - no need to open it when the engine is warm. Coolant should appear bright green, orange, or pink depending on the type your vehicle uses. A murky, rusty, or oily appearance suggests contamination. Never open the radiator cap itself on a hot engine - pressurized coolant can cause severe burns.
Check brake fluid level
The brake fluid reservoir is a small, semi-transparent container on top of the brake master cylinder, typically located near the back of the engine bay on the driver's side. Check the level against the MIN/MAX markings on the reservoir exterior. Brake fluid should be light yellow and clear; dark or cloudy fluid indicates it has absorbed moisture and may need to be flushed by a professional. Note that brake fluid level naturally drops slightly as brake pads wear - a very low level combined with a brake warning light deserves immediate professional attention.
Check power steering fluid (if applicable)
Many newer vehicles use electric power steering and have no fluid reservoir - check your owner's manual to confirm. If your vehicle has hydraulic power steering, locate the reservoir (often labeled with a steering wheel icon) and check the level against the dipstick attached to the cap or the markings on the reservoir body. The fluid should be clear to light pink. Dark, burnt-smelling fluid suggests it needs changing. Difficulty steering or a whining noise when turning are warning signs worth investigating promptly.
Note any consistently low fluids and act accordingly
A fluid that's occasionally a little low is normal. A fluid that drops noticeably between checks suggests a leak or internal issue. Document what you find - keeping a simple log of fluid levels over time helps you spot trends. If any fluid repeatedly drops without a clear explanation, schedule a mechanic inspection rather than simply topping it off each time.
Never Open a Hot Radiator Cap
The cooling system operates under pressure. Removing the radiator cap while the engine is hot can cause boiling coolant and steam to eject with force, resulting in serious burns. Always wait until the engine has cooled completely - typically 30 or more minutes after shutting off - before opening the radiator cap or coolant reservoir cap on certain vehicle designs. When in doubt, leave it closed.
If you notice a warning light while driving, don't wait for your next scheduled check. Our plain-English dashboard warning light guide explains which alerts need prompt attention and which can wait for your next service appointment.
What to Do After Your Checks
Once you've worked through all four fluid checks, take a moment to look at the ground beneath where your car was parked. A fresh oil stain, bright green puddle, or clear watery spot can each point to specific leaks worth reporting to a mechanic.
Record what you found - even a quick note in your phone with the date and fluid levels gives you useful data over time. See our article on keeping a vehicle maintenance log for practical templates and what to track.
Turn Fluid Checks Into a Monthly Habit
Linking your fluid check to something you already do - like the first of each month or a regular fill-up - makes it easier to stay consistent. A quick visual scan takes only a few minutes and can catch a developing problem before it becomes a repair bill. Seasonal checks are especially valuable; our seasonal car maintenance checklist covers what to prioritize as conditions change.
Drivers building broader under-hood awareness may also want to read our comparison of conventional and synthetic motor oils and our guide to understanding oil change intervals. Both help you make more informed decisions when it's time to top off or replace fluids.
If you'd like to build fluid checks into a broader safety routine, our pre-drive safety routine article offers a complementary set of quick habits worth developing.

Author
Automotive Editorial Team
Automotive Editorial Team is the collective byline for our editorial team and contributor network. Articles published under this byline or an editorial pen name are researched, written, and reviewed according to our editorial standards for clarity, consistency, and independence before publication.
View all articles →